A well-pitched dome tent can make the difference between a comfortable outdoor stay and a frustrating night of sagging fabric, poor airflow, loose stakes, or rainwater pooling near the floor. For campers, event organizers, and outdoor gear buyers, tent setup is not just a beginner skill. It affects safety, comfort, product lifespan, and the total value of the shelter.
This guide explains how to choose the right campsite, assemble a dome tent correctly, secure it in wind, improve waterproof performance, and avoid the setup mistakes that often reduce tent reliability.
Table of Contents
Why Setup Quality Matters Before the First Night
An outdoor dome tent is designed to balance space, structural stability, and portability. Dome-style structures are popular because crossed or curved poles help distribute tension across the shelter instead of relying on one vertical frame.
But even a well-designed shelter needs correct setup. A loose rainfly can flap in wind. Poorly placed stakes can reduce stability. A groundsheet that sticks out beyond the tent footprint can collect rainwater. A campsite in a low area can turn into a water channel after sudden rain.
For retailers and outdoor project buyers, setup experience is part of lifecycle value. A tent that is easier to pitch, tension, ventilate, and repack often creates fewer customer complaints and better long-term satisfaction.
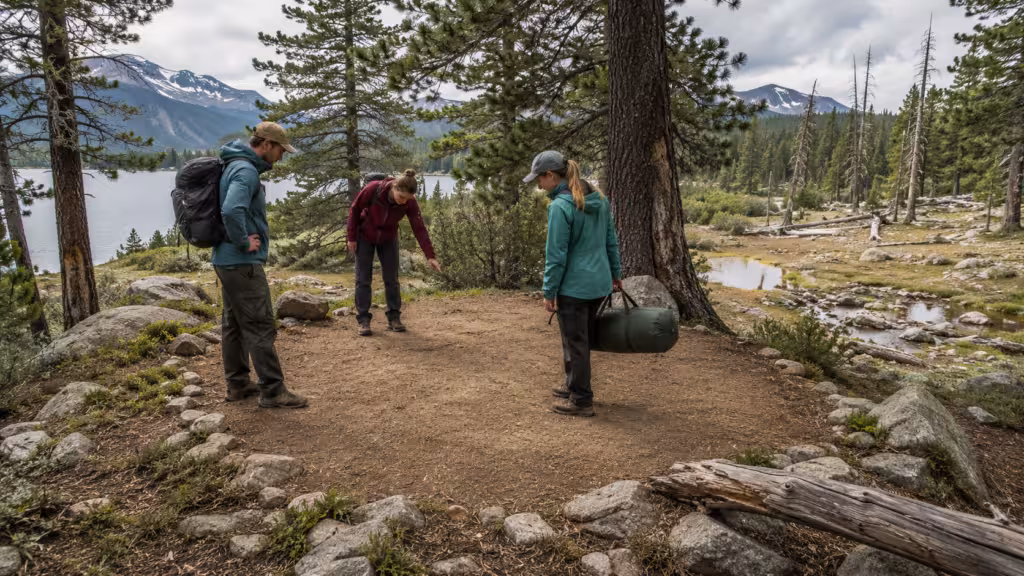
Choose the Campsite Before Unpacking the Tent
The best setup starts before the tent bag is opened. REI’s tent setup guide recommends choosing a suitable campsite first, then preparing the footprint, poles, rainfly, and guylines in the right sequence.
Look for a site that is:
- Flat enough for sleeping and stable pole tension
- Slightly elevated instead of low and water-prone
- Free from sharp rocks, roots, broken branches, and debris
- Protected from direct strong wind when possible
- Away from dead trees or unstable overhead branches
- Large enough for the full tent body, guy lines, and entry area
Leave No Trace also recommends camping on durable surfaces, which helps protect outdoor environments and reduces unnecessary damage around campsites.
For commercial outdoor activities, festivals, or campsite operators, this step matters even more. A durable and level pitch area reduces wear on the tent floor, improves guest experience, and helps the shelter perform more consistently during repeated use.
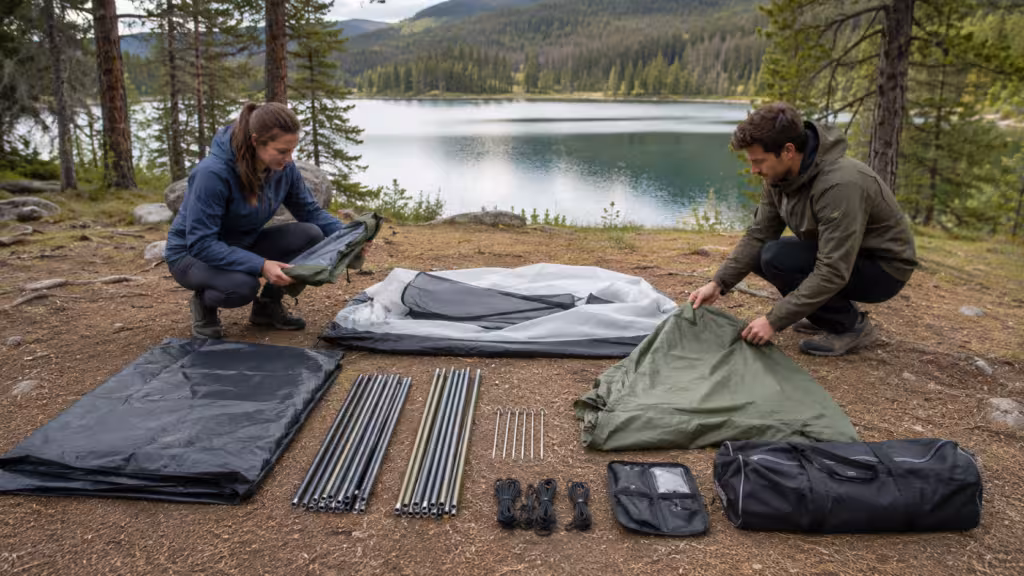
Check the Tent Parts Before Assembly
Before setting up, lay out the components and check that everything is present.
A typical outdoor dome tent setup may include:
- Tent body
- Groundsheet or tent floor
- Aluminum or fiberglass poles
- Rainfly
- Stakes or pegs
- Guy lines
- Carrying bag
- Repair accessories
If you are using a larger outdoor dome tent for family camping or event use, two people can usually pitch it faster and with less fabric dragging. This also helps prevent pole stress, especially when raising the structure.
Pro Tip: Count stakes and inspect pole connections before leaving for the campsite. Missing one corner stake or guy line may not seem serious at home, but it can affect wind stability outdoors.
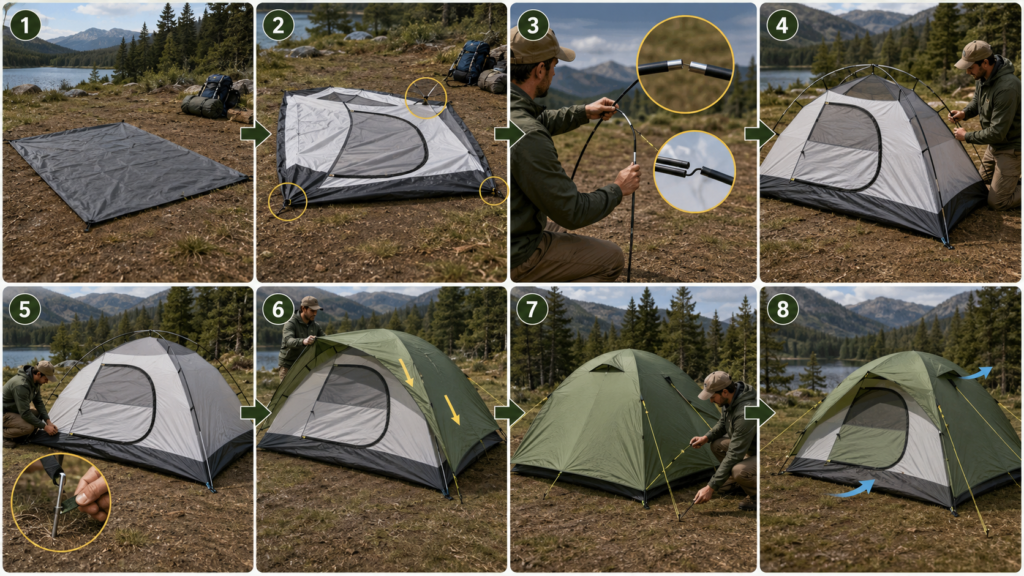
Step-by-Step Dome Tent Setup Guide
Start by spreading the groundsheet or tent floor on the chosen site. Keep it flat and aligned with the sleeping direction, entrance direction, and wind direction. If using a separate footprint, make sure it does not extend beyond the tent body, otherwise it may channel rainwater underneath the tent.
Next, lay the tent body over the groundsheet and identify the door, corners, and pole sleeves or clips. Assemble the poles carefully. If the tent uses shock-corded poles, let each section connect naturally instead of forcing the joints at an angle.
Insert or clip the poles according to the tent structure. Dome tents usually rely on crossed pole tension to lift the body. Raise the tent slowly and secure pole ends into corner grommets or pockets.
Once the tent stands, stake the corners. Pull the base fabric firm but not overstretched. Attach the rainfly, align doors and vents, then secure clips or buckles. Finish by tensioning the guy lines.
This order helps create a stable structure:
1.Groundsheet or tent floor
2.Tent body alignment
3.Pole assembly
4.Dome structure raised
5.Corner stakes installed
6.Rainfly attached
7.Guy lines tensioned
8.Ventilation checked
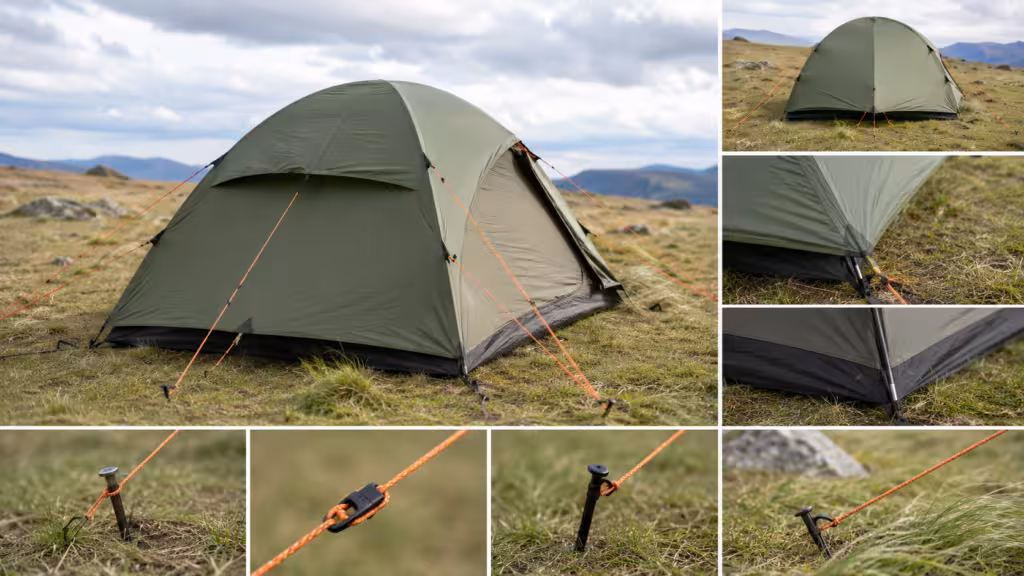
How to Secure a Dome Tent in Wind
Wind stability depends on correct orientation and tension. If possible, place the lower or stronger side of the tent toward the prevailing wind. Avoid setting the entrance directly into strong wind, especially if the door is large.
Use all key stakes, not only the four corners. Guy lines should be tensioned evenly, not pulled so hard that they distort the tent shape. In stronger wind, check tension after 20–30 minutes because fabric and lines may settle.
For larger dome tents, wind management is part of operational reliability. Event operators and campsite buyers should check whether the tent design includes enough guy-out points, durable poles, and fabric strength for repeated outdoor use.
A practical setup should aim for firm tension, clean fabric lines, and no loose rainfly sections. If the fly is flapping heavily, it is not only noisy; it can also increase fabric wear over time.
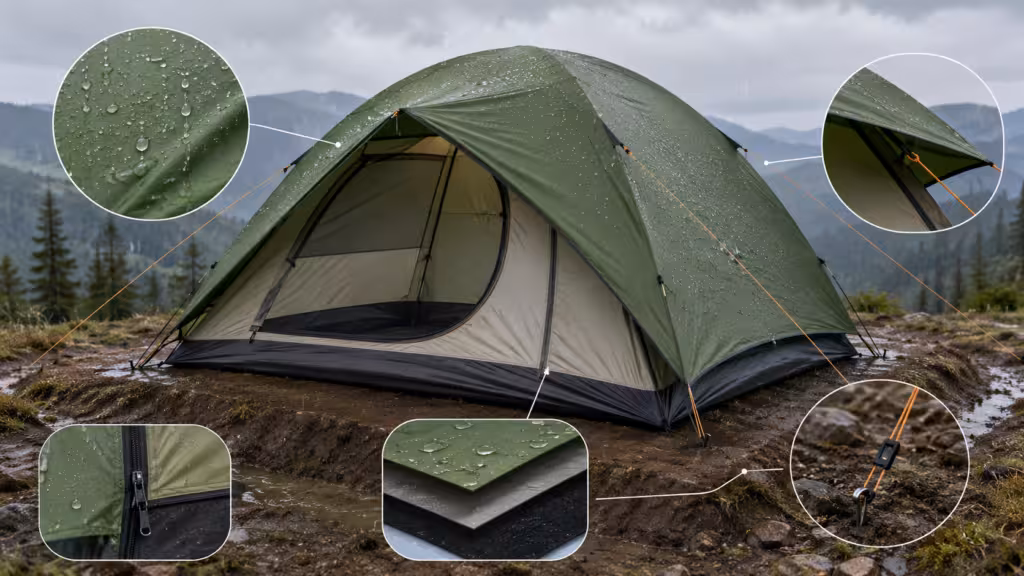
Improve Waterproof Performance During Setup
Waterproof fabric helps, but setup decides whether the protection works in real conditions. A rainfly should sit above the inner tent with enough separation for airflow. If the fly touches the inner tent, condensation or rain transfer can become more noticeable.
Make sure:
- The rainfly is centered
- The fly is tight but not overstretched
- Doors and zippers are covered
- Guy lines keep the fly away from the inner wall
- The floor area is not lower than the surrounding ground
- The footprint does not collect water under the tent
The Outdoor Dome Tent page lists waterproof fabric specifications, including PU-coated materials and an Oxford waterproof floor, which can support better weather protection when setup is done correctly.
For buyers, this is an important point: waterproof ratings and fabric quality matter, but correct pitching, drainage, and tension affect real-world performance.
Ventilation Is Part of Comfort
A common setup mistake is closing every vent to “stay warmer”or“keep moisture out.” In practice, poor airflow can lead to condensation, stuffiness, and damp sleeping conditions.
Good ventilation usually requires:
- Opening roof or side vents when weather allows
- Keeping airflow paths clear
- Avoiding full contact between rainfly and inner tent
- Using mesh openings in warm weather
- Managing door openings based on wind and rain direction
Ventilation is especially important for larger dome tents used by groups, families, festival guests, or outdoor event participants. More people inside means more moisture from breathing and more need for air exchange.
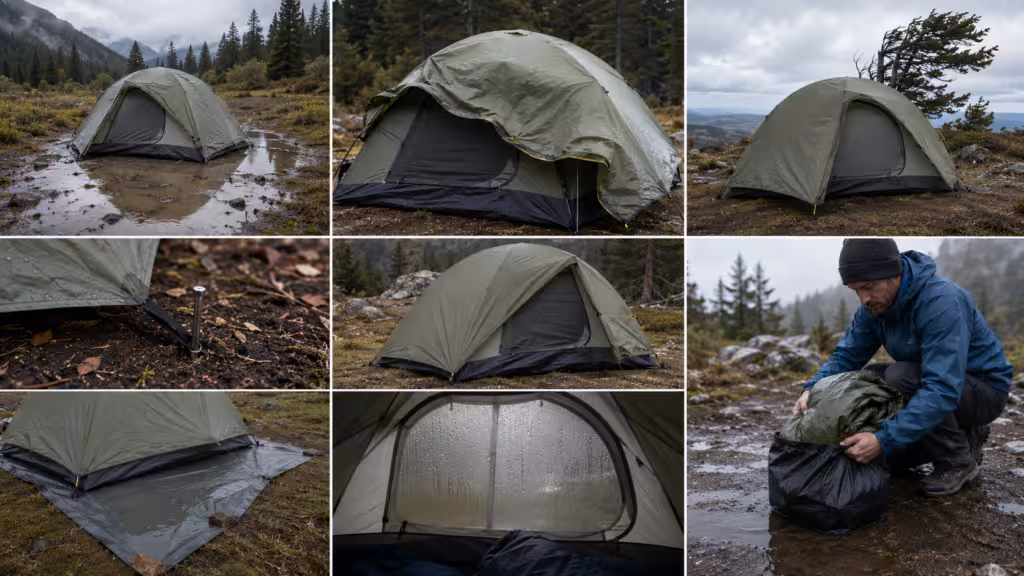
Common Dome Tent Setup Mistakes
Most problems come from small setup errors rather than product failure.
Avoid these mistakes:
- Pitching in a low drainage area
- Leaving the rainfly loose
- Skipping guy lines in mild wind
- Driving stakes straight down instead of angled
- Pulling one corner tighter than the others
- Letting the footprint extend beyond the tent
- Closing all vents overnight
- Packing the tent wet and storing it long-term
REI’s camping beginner guidance also recommends setting up tent, sleeping bag, and pad as soon as you arrive, so you are not working in the dark later.
When an Outdoor Dome Tent Makes Sense
An outdoor dome tent is useful when users need a balance of interior space, stable structure, manageable setup, and weather-ready design. It can work well for camping trips, hiking base camps, festivals, outdoor events, and commercial outdoor accommodation projects.
For B2B buyers, the purchase decision should not only focus on size. Consider fabric durability, pole material, waterproof performance, ventilation, packaging, customization options, MOQ, and supplier capability.
A good tent supplier should support more than product delivery. For distributors, campsite operators, and outdoor event brands, customization, consistent quality, packing, replacement parts, and production reliability can affect long-term performance and total cost of ownership.
Conclusion
A successful dome tent setup is not complicated, but it does require the right sequence: choose a durable campsite, assemble the poles carefully, stake the base evenly, tension the rainfly, secure the guy lines, and keep ventilation in mind.
For everyday campers, these steps improve comfort and reduce frustration. For outdoor brands, campsite operators, and event buyers, setup quality also affects customer satisfaction, product reputation, and long-term shelter value.
FAQ
How long does it take to set up a dome tent?
A small dome tent may take 5–10 minutes. A larger outdoor dome tent may take longer, especially when rainfly, stakes, and guy lines are installed properly.
Can one person set up a dome tent?
Yes, many dome tents can be set up by one person. Larger models are easier and safer with two people, especially in wind.
Where is the best place to pitch a dome tent?
Choose flat, durable, slightly elevated ground away from sharp objects, water channels, unstable branches, and direct strong wind.
How do you make a dome tent more stable in wind?
Use all stakes, tension the guy lines, angle pegs properly, avoid facing the door into strong wind, and recheck tension after the fabric settles.
Why is my dome tent sagging?
Sagging usually comes from loose poles, poor staking, uneven ground, weak guy line tension, or an incorrectly attached rainfly.
Should I use a groundsheet under a dome tent?
Yes. A groundsheet helps protect the tent floor from abrasion, moisture, dirt, and long-term wear.