Welcome to My Blog!
Before we dive into the content, if you’re interested in our products or have any questions, please feel free to visit our Contact Us page on the website. Our team is ready to assist you with inquiries, orders, or any support you may need.
Now, let’s get started on our journey together. I hope you find the content here insightful, engaging, and valuable.
Table of Contents
Introduction

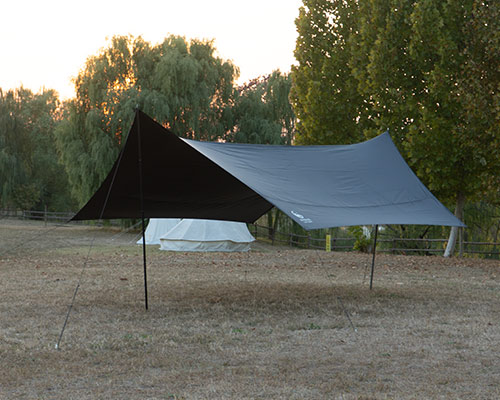
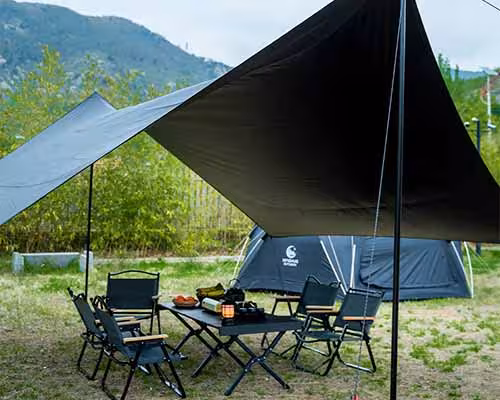
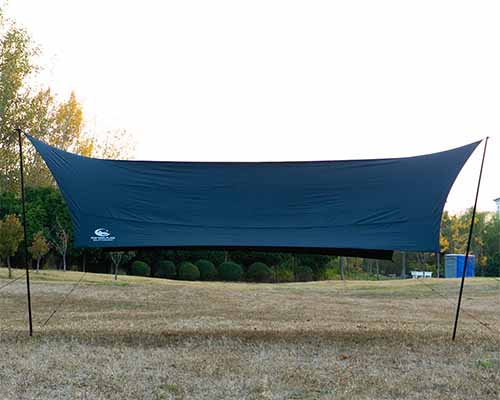
The 20×10 canopy tent is rapidly becoming one of the most popular solutions for trade shows, festivals, and outdoor promotions. Its larger size provides ample space for exhibition booths, branded event zones, or catering stations, making it an excellent choice for anyone seeking to make a significant impact at events. In this guide, we’ll explore why a 20×10 tent is right for your brand, how to set it up quickly, and how to integrate effective branding strategies to stand out.
Why Choose a 20×10 Canopy Tent?
Market Trends: Roadshow Events Surge by 22%
In 2025, outdoor event spending continues to grow, especially for roadshows and brand activations. As companies look for more engaging ways to present their products, the demand for larger, customizable event tents like the 20×10 canopy tent has skyrocketed. This trend shows no signs of slowing, with a 22% increase in roadshow events expected over the next year. Larger tents are ideal for accommodating displays, booths, and interactive areas that attract more foot traffic.
Space Advantage: Standard Booth vs. 20×10 Layout Comparison
Compared to a traditional 10×10 booth, a 20×10 canopy tent offers double the space, making it perfect for events where more room is needed for both product displays and customer interaction. The extra space allows for more flexibility in layout, meaning you can design a more functional and visually appealing setup.
| Feature | 10×10 Booth | 20×10 Canopy Tent |
|---|---|---|
| Display Area | 100 sq ft | 200 sq ft |
| Setup Flexibility | Limited | High |
| Brand Visibility | Moderate | High |
| Functionality | Small Booth | Larger, multi-use setup |
A 20×10 canopy tent not only improves visibility but also increases functionality, allowing your brand to take full advantage of available space at any event.
Specifications and Materials Breakdown
Frame: Aluminum 50mm Octagonal vs. Steel Truss
When choosing your 20×10 canopy tent, it’s essential to understand the differences in frame materials. Aluminum frames are lightweight and easy to transport, while steel truss frames offer superior strength and durability.
| Feature | Aluminum (50mm Octagonal) | Steel Truss |
|---|---|---|
| Weight | Lighter, portable | Heavier, more durable |
| Wind Resistance | Suitable for mild to moderate winds | Ideal for high wind resistance |
| Cost | More affordable | Higher cost but stronger |
For most events, an aluminum 50mm octagonal frame offers a good balance of portability and strength, but if your setup will face high winds, steel might be the better option.
Roof Fabric: 600D PVC, 900D PU, Fire Retardant UV50+ Differences
The fabric you choose for your 20×10 canopy tent impacts both its durability and performance. For maximum weather resistance, we recommend:
- 600D PVC: Waterproof and weather-resistant.
- 900D PU: Stronger material, ideal for prolonged exposure to harsh elements.
- Fire Retardant and UV50+: Protects against fire and harmful UV rays.
Choosing the right fabric will ensure your 20×10 canopy tent stays in great condition throughout your event.
Side Height and Wind Load: 2.4m vs. 3m Wind Resistance Testing
Another key consideration is the height of your 20×10 canopy tent. Higher tents, such as those with a 3m side height, provide more headroom and allow for better air circulation. However, they might not be as stable in high winds as tents with a 2.4m side height. Both options come with different wind load capacities, so choose based on your specific event location and weather conditions.
5-Minute Quick Setup Process
Tool Preparation Checklist
Before setting up your 20×10 canopy tent, make sure you have the following tools ready:
- Tent frame parts
- Roof fabric
- Sidewalls (if required)
- Hammer or mallet
- Sandbags or weight bags
- Tie-down ropes
3-Person Workflow Diagram (Unfold, Lock Legs, Secure)
A quick and efficient setup can be done in three simple steps with three people:
- Unfold the Frame: Lay the frame on the ground, then lift it into position.
- Lock the Legs: Secure each leg into place to ensure the frame is stable.
- Add Weight Bags & Ropes: Place weight bags at each corner and tie down the tent to keep it secure.
Common Mistakes and Corrections
- Mistake: Forgetting to secure the legs properly.
Correction: Always double-check the locking mechanism before proceeding. - Mistake: Skipping wind straps in high-wind areas.
Correction: Use tie-down ropes to ensure stability, particularly when facing windy conditions.
Branding Integration: 4 Key Tips
Full-Color Sublimation Printing Process
When it comes to branding, full-color sublimation printing ensures vibrant, high-quality designs on your 20×10 canopy tent. This process allows for highly detailed logos and graphics that stand out in any setting.
Removable Banner Velcro System
A removable banner Velcro system allows you to easily change out graphics, logos, or event-specific details like dates. This adds flexibility for multiple events.
Ground Extension Graphics and LED Light Tracks
Maximize your branding visibility with ground extension printing and LED light tracks. These additions ensure that your tent is visible day or night, enhancing your brand’s presence.
On-Site Case Studies: Car Show & Beer Festival
- Car Show: Full canopy with side walls and interactive display zones.
- Beer Festival: Fire-resistant roof fabric and bar-side walls for a safe and functional space.
Transportation and Storage Tips
| Product Name | Camping canopy tent |
| Brand | Xingyue |
| Color | Black /Beige/Brown |
| Tarp Material | Oxford Cloth 210D |
| Poles | 25mm Diameter Iron Pipe |
| Size | 550*440*240cm |
| Occasions | Travelling, Backpacking, Picnic, Camping, Hiking |
Folded Size and Box Weight
When packed, a 20×10 canopy tent will fit neatly into a storage box, with dimensions depending on the frame and fabric choice. The weight varies but should always be manageable for transport.
Sea Freight vs. Air Freight Packaging Comparison
- Sea Freight: More cost-effective, suitable for larger orders or longer delivery times.
- Air Freight: Faster but more expensive, ideal for last-minute needs or smaller orders.
Conclusion
The 20×10 canopy tent offers unmatched flexibility, space, and branding potential, making it the ideal choice for your next outdoor event. With customizable features, quick setup, and exceptional durability, it’s the perfect tool for any brand looking to stand out. Whether you’re hosting a roadshow, attending a trade show, or launching a pop-up food stall, this tent has got you covered.
FAQ
Can I customize my 20×10 canopy tent with my own colors and logo?
Yes, we offer full customization options, including color choices, logo printing, and banner designs.
How long does it take to set up the 20×10 canopy tent?
The setup process typically takes around 5 minutes with a team of three people, depending on your experience and the complexity of the design.
Is the 20×10 canopy tent suitable for high-wind conditions?
Yes, our 20×10 canopy tents come with robust wind resistance features, but we recommend using sandbags and tie-down ropes in particularly windy environments.